Formula Columns
Introduction
The grid provides a powerful formula column that allows you to perform calculations on the data in the grid. The formula column is a special column that is not part of the data, but instead is calculated based on the data in the grid. This means that you can use the formula column to perform calculations on the data in the grid, and then use the formula column to perform calculations on the data in the grid.
Formula Column format
Formula columns store their formula in the dataField. The formula is a string that contains the formula to be calculated. The formula looks like this:
If the fields are: firstName, lastName, product, price, quantity, inStock:
1) If inStock, return In Stock else Out of Stock :
{"if" : [{"var" : "inStock"}, "In Stock", "Out of Stock"]}
2) Concatenate firstName and lastName :
{"cat" : [{"var" : "firstName"}, " ", {"var" : "lastName"}]}
3) Calculate sales tax :
{"*" : [{"var" : "price"}, 0.08]}
4) Calculate total price :
{"*" : [{"var" : "price"}, {"var" : "quantity"}]}
5) Calculate total price with sales tax :
{"+" : [{"*" : [{"var" : "price"}, {"var" : "quantity"}]}, {"*" : [{"var" : "price"}, {"var" : "quantity"}, 0.08]}]}
Have ChatGPT make your formulas!
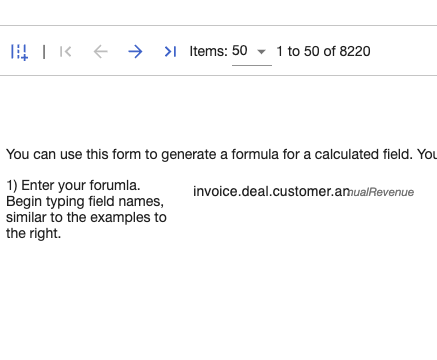
As you can see, some of these formulas can get pretty complicated. Fortunately, the grid has a built in integration with OpenAI's GPT-3 API, which allows you to use natural language to create formulas. If you have an OpenAI API key, you can use the grid's built in integration with the GPT-3 API to have the GPT-3 API generate formulas for you. Otherwise, your users can copy the generated prompt, and paste it into the Chat GPT UI to generate the formula, and then paste the formula into the grid. To do this, first type in the formula you want to generate, and then click the "Copy GPT Prompt" button. This will copy a specially formatted prompt to the clipboard, and open a new tab to the GPT-3 API. You can then paste the prompt into the API and get the results. As you start typing the field names, you should see them autocomplete like the screenshot below: You can hit the tab key to select the autocomplete suggestion, or you can continue typing.
Once you are done typing the formula, you can click the "Copy GPT Prompt" button to copy the prompt to the clipboard. This will copy a specially formatted prompt to the clipboard, and open a new tab to the GPT-3 API. You can then paste the prompt into the API and get the results. The screenshot below shows the prompt that is copied to the clipboard:
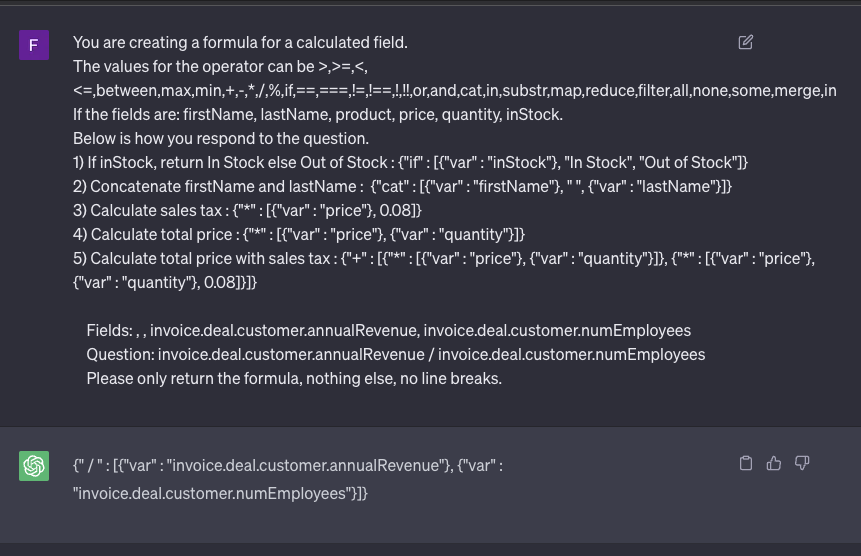
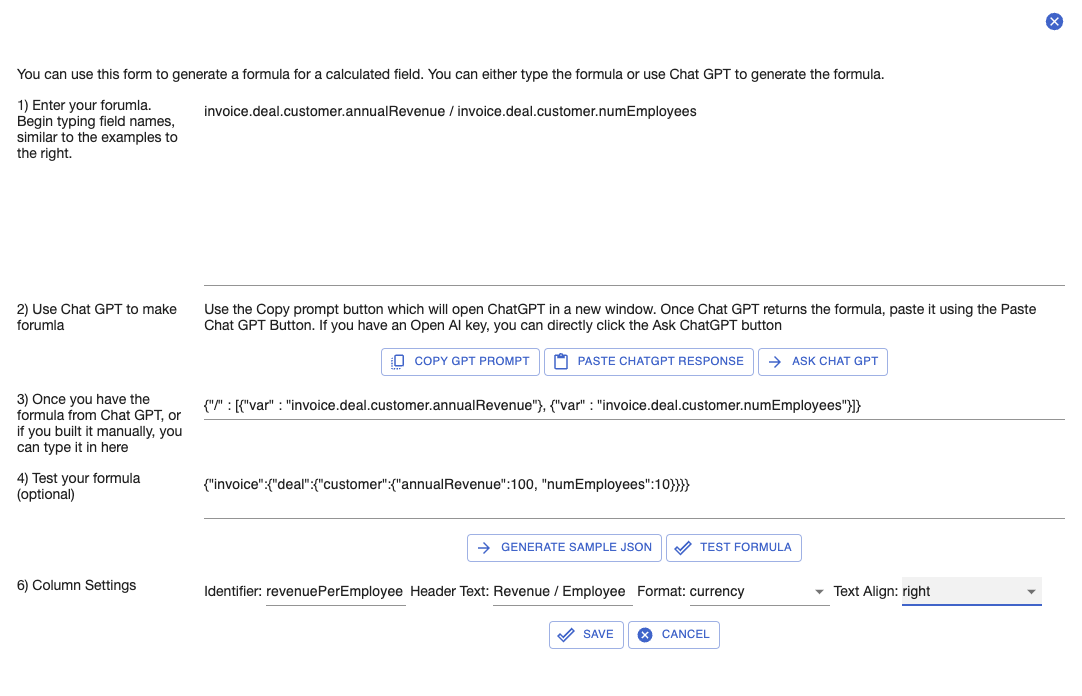
Once you have the response from the GPT-3 API, you can paste the response into the formula column, by clicking the "Paste Chat GPT response" button. If you are using the chatGptEndpoint option, this will be done automatically for you.
Once you paste the response, the grid will parse it, and allow you to test the formula, set header, format, and text align for the new column. The screenshot below shows the formula column UI:
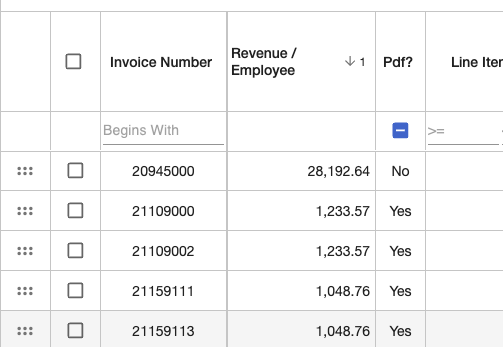
Once you have the results, you can click the "Apply" button to apply the formula to the grid. You should see it in the grid like below:
Managing Formula Columns
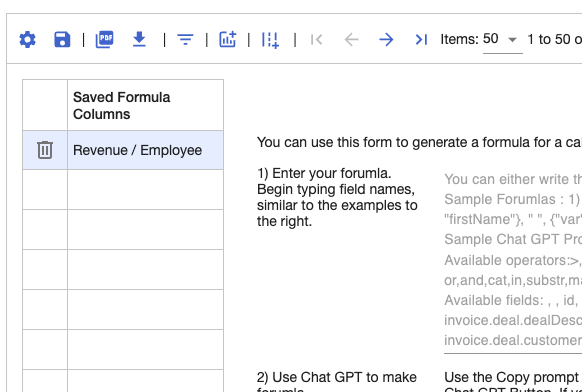
Once you have created a formula column, you will see it in the column picker, and you can use it like any other column. You will see it in the grid as well as the column picker. You can also edit the formula column by clicking the same formula button in the column picker. This will open the formula column UI, where you can edit the formula, and set the header, format, and text align for the column. The screenshot below shows the formula column UI:
Conclusion
In this tutorial, we covered how to use the grid's formula column to perform calculations on the data in the grid. We also covered how to use the grid's built in integration with the GPT-3 API to have the GPT-3 API generate formulas for you. Finally, we covered how to manage formula columns once they have been created. The formula columns are stored alongside the other settings in the grid's state, so they will be persisted when the grid is reloaded.